巧用 GoTTY 优雅的管理 Docker 容器权限

Posted by Mike on 2020-05-13

GoTTY 是一个简单的基于 Go 语言的命令行工具,它可以将你的终端(TTY)作为 Web 程序共享。GoTTY 的架构是基于 Hterm + Web Socket 的,它能在 Web 浏览器上运行一个基于 JavaScript 的终端,并支持通过 HTTPHTTPS 访问。

项目地址:https://github.com/yudai/gotty

安装 GoTTY

GoTTY 原生支持良好的跨平台性,开箱即用。只需下载对应平台的二进制包就行了,这里以 Linux 平台为例。

1
2
3
4
5
6
7
# 下载并解压 GoTTY 安装包
$ wget https://github.com/yudai/gotty/releases/download/v1.0.1/gotty_linux_amd64.tar.gz
$ tar -xzvf gotty_linux_amd64.tar.gz

# 复制可执行文件到指定目录并赋予执行权限
$ sudo cp gotty /usr/local/bin/
$ chmod +x /usr/local/bin/gotty

更多平台的二进制安装包,可自行在官方项目地址的 Releases 页面进行下载。

如果你使用的是 Mac,也可以通过 Homebrew 来实现一键安装。

1
$ brew install yudai/gotty/gotty

安装完成后,检查一下 Gotty 的版本,以验证是否安装正确。

1
2
$ gotty -version
gotty version 1.0.1

使用 GoTTY

你可以使用任何命令来作为 GoTTY 的参数运行,例如:gotty top

GoTTY 语法

  1. GoTTY 命令的常规语法
1
Usage: gotty [options] <command> [<arguments...>]
  1. GoTTY 命令的常用参数
1
2
3
4
5
6
7
8
9
10
11
12
13
14
15
16
17
18
19
20
21
22
23
24
25
26
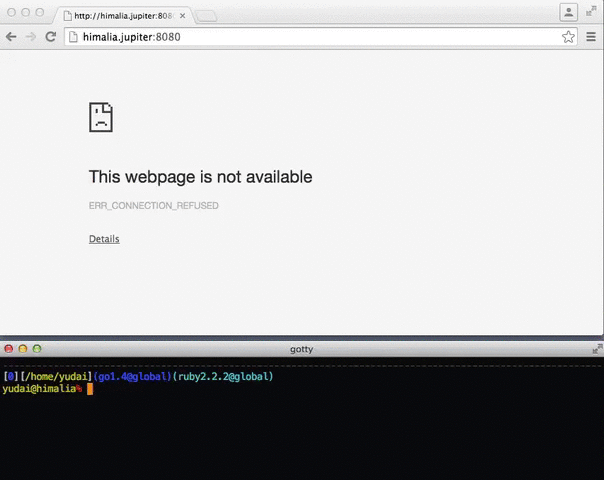
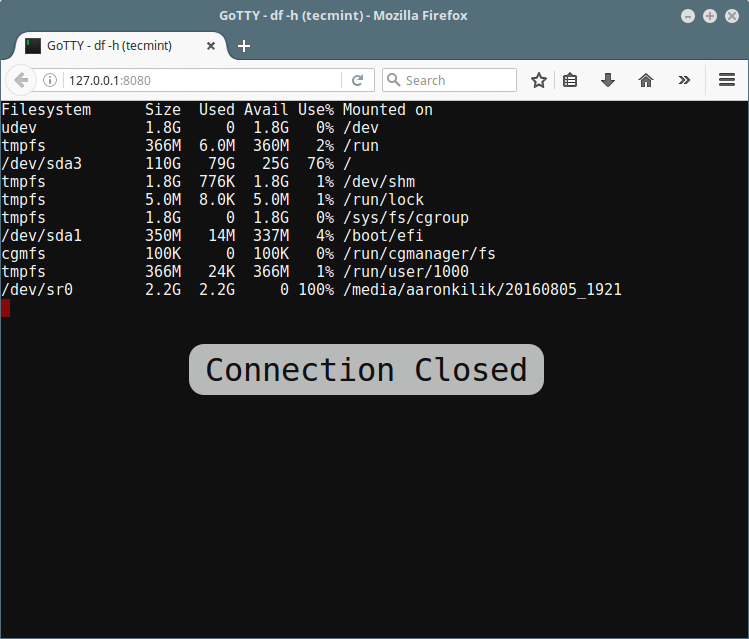
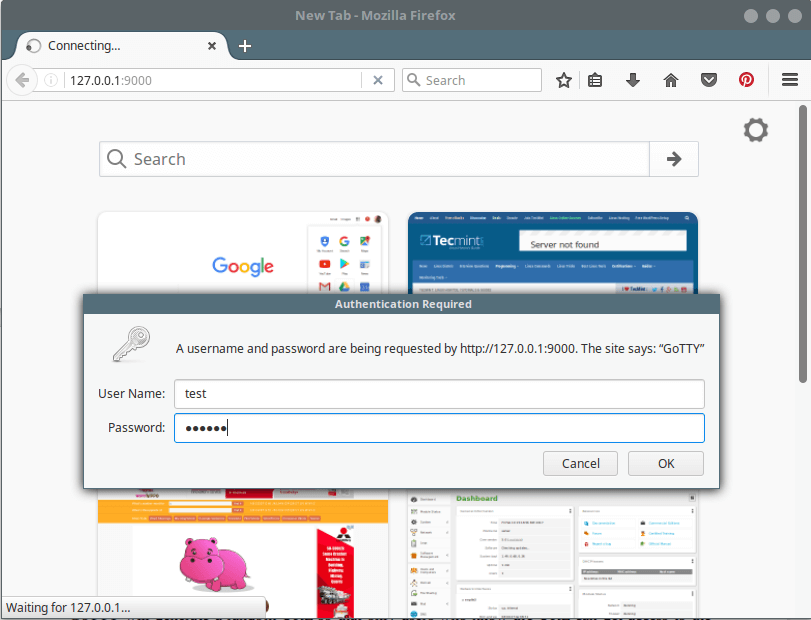
--address value, -a value     IP address to listen (default: "0.0.0.0") [$GOTTY_ADDRESS]
--port value, -p value Port number to liten (default: "8080") [$GOTTY_PORT]
--permit-write, -w Permit clients to write to the TTY (BE CAREFUL) [$GOTTY_PERMIT_WRITE]
--credential value, -c value Credential for Basic Authentication (ex: user:pass, default disabled) [$GOTTY_CREDENTIAL]
--random-url, -r Add a random string to the URL [$GOTTY_RANDOM_URL]
--random-url-length value Random URL length (default: 8) [$GOTTY_RANDOM_URL_LENGTH]
--tls, -t Enable TLS/SSL [$GOTTY_TLS]
--tls-crt value TLS/SSL certificate file path (default: "~/.gotty.crt") [$GOTTY_TLS_CRT]
--tls-key value TLS/SSL key file path (default: "~/.gotty.key") [$GOTTY_TLS_KEY]
--tls-ca-crt value TLS/SSL CA certificate file for client certifications (default: "~/.gotty.ca.crt") [$GOTTY_TLS_CA_CRT]
--index value Custom index.html file [$GOTTY_INDEX]
--title-format value Title format of browser window (default: "{{ .command }}@{{ .hostname }}") [$GOTTY_TITLE_FORMAT]
--reconnect Enable reconnection [$GOTTY_RECONNECT]
--reconnect-time value Time to reconnect (default: 10) [$GOTTY_RECONNECT_TIME]
--max-connection value Maximum connection to gotty (default: 0) [$GOTTY_MAX_CONNECTION]
--once Accept only one client and exit on disconnection [$GOTTY_ONCE]
--timeout value Timeout seconds for waiting a client(0 to disable) (default: 0) [$GOTTY_TIMEOUT]
--permit-arguments Permit clients to send command line arguments in URL (e.g. http://example.com:8080/?arg=AAA&arg=BBB) [$GOTTY_PERMIT_ARGUMENTS]
--width value Static width of the screen, 0(default) means dynamically resize (default: 0) [$GOTTY_WIDTH]
--height value Static height of the screen, 0(default) means dynamically resize (default: 0) [$GOTTY_HEIGHT]
--ws-origin value A regular expression that matches origin URLs to be accepted by WebSocket. No cross origin requests are acceptable by default [$GOTTY_WS_ORIGIN]
--term value Terminal name to use on the browser, one of xterm or hterm. (default: "xterm") [$GOTTY_TERM]
--close-signal value Signal sent to the command process when gotty close it (default: SIGHUP) (default: 1) [$GOTTY_CLOSE_SIGNAL]
--close-timeout value Time in seconds to force kill process after client is disconnected (default: -1) (default: -1) [$GOTTY_CLOSE_TIMEOUT]
--config value Config file path (default: "~/.gotty") [$GOTTY_CONFIG]
--version, -v print the version
  1. GoTTY 的配置文件

除了通过命令行直接给 GoTTY 指定参数外,你还可以通过向 GoTTY 命令提供配置文件来自定义默认参数和终端的样式。默认情况下,GoTTY 会加载用户目录下的 .gotty 文件 (~/.gotty) 为配置文件。

1
2
3
4
5
6
7
8
9
10
11
12
13
$ cat ~/.gotty
// Listen at port 9000 by default
port = "9000"

// Enable TSL/SSL by default
enable_tls = true

// hterm preferences
// Smaller font and a little bit bluer background color
preferences {
font_size = 5
background_color = "rgb(16, 16, 32)"
}

使用实例

GoTTY 命令运行完成后,默认会在 8080 启动一个 Web 服务器。你只需在浏览器中打开 http://127.0.0.1:8080/,就会看到运行的命令,仿佛和运行在终端中一样。GoTTY 支持的功能相当丰富,下面我就来看几个比较常用的使用实例。

  1. 通过 GoTTY 直接在 Web 端查看系统分区空间及使用率
1
$ gotty df -h

  1. 允许在 Web 终端中运行命令

默认情况下,GoTTY 不允许在 Web 终端中进行输入。但是,你可以使用 -w--permit-write 选项来启用 Web 终端可写入 TTY 的特性。

下面我们演示一个用 vi 命令在浏览器中编辑 fossmint.txt 文件的例子。

1
$ gotty -w vi fossmint.txt

我们可以从浏览器中看到打开的 vi 界面和在终端打开的一模一样。

  1. 使用 GoTTY 对容器内部进行管理

众所周知,在 Kubernetes / Docker 环境下,我们需要提供一种能力让研发或者其它相关技术人员可以在不登陆宿主机的情况下直接访问容器或者是查看容器中应用程序的当前状态。基于上面介绍的允许 Web 终端写入 TTY 的特性,我们可以灵活的将这一特性运用到容器管理中来。

1
2
# 使用 Docker 命令进入容器内部
$ gotty -w --permit-arguments docker exec -ti
1
2
# 使用 Kubectl 命令进入容器内部
$ gotty -w --permit-arguments kubectl exec -ti

执行上面命令后,你就可以直接通过浏览器传入容器的 ID 和进入容器需要执行的命令。这里传入的命令是 /bin/bash:

1
http://172.172.241.180:8080/?arg=6f&arg=%2fbin%2fbash

注意:使用浏览器频繁进入容器之后,容器内部会产生大量 /bin/bash 进程 ,一般不推荐直接进入容器。

  1. 给 GoTTY 加上基本的身份验证

默认情况下通过浏览器访问 GoTTY 是不需要验证的,任何人都可以访问。为了更加的安全,我们可以给 GoTTY 加上基本身份验证机制。这样在通过浏览器访问时,就需要输入指定的用户名和密码才能访问到 GoTTY 所在的服务器。

要给 GoTTY 加上基本的验证,用到的是 -c 选项,该选项主要用来指定访问 GoTTY 时所需的用户名和密码。

1
2
# 用户名是:test 密码是:@67890
$ gotty -w -p "9000" -c "test:@67890" glances

  1. 给 Gotty 生成随机 URL

除了身份验证外,限制访问服务器的另一种方法是使用随机 URL。通过 GoTTY-r 选项,我们就能生成一个随机 URL,这样就只有知道该 URL 的用户才可以访问该服务器。

1
$ gotty -r glances

你还可以使用下面的选项来定义浏览器标题。

1
$ gotty -r --title-format "GoTTY - {{ .Command }} ({{ .Hostname }})" glances

  1. 给 GoTTY 启用 SSL/TLS 认证

默认情况下服务器和客户端之间的所有连接都不加密,当你通过 GoTTY 发送敏感数据时,为保证数据完全建议你启用 SSL/TLS

GoTTY 启用 SSL/TLS 的支持需要使用 -t--tls 选项。默认情况下,GoTTY 会读取用户主目录下的证书文件和密钥文件 ( ~/.gotty.crt~/.gotty.key)。

首先,我们先创建一个自签名的证书文件以及密钥文件。

1
$ openssl req -x509 -nodes -days 365 -newkey rsa:2048 -keyout ~/.gotty.key -out ~/.gotty.crt

然后,通过下面的命令启用 GoTTYSSL/TLS 特性后,以达到安全访问 GoTTY 的目的。

1
$ gotty -tr --title-format "GoTTY - {{ .Command }} ({{ .Hostname }})" glances
  1. 与多个客户端同时共享终端

如果你需要和多个客户端同时共享一个终端,这里你需要使用一个终端多路复用器与多个客户端共享单个进程,以下命令以 tmux 为例。

首先,我们先启动一个名为 gotty 的新 tmux 会话。

1
$ gotty tmux new -A -s gotty

其次,在另外一个终端上 attach 上这个 tmux 会话。

1
2
$ tmux attach -t gotty
$ vim test.php

最后,我们通过浏览器可以实时看到在终端中所有的输入,这种场景特别适用于教学和演示。

参考文档

  1. http://www.google.com

  2. https://ywnz.com/linuxrj/4060.html

  3. https://zhuanlan.zhihu.com/p/26590894

  4. https://blog.csdn.net/cj2580/article/details/79318726

  5. https://www.tecmint.com/gotty-share-linux-terminal-in-web-browser/